Why Local State Breaks in Teams

Terraform remote state on AWS with an S3 backend and DynamoDB locking is the established solution to a problem that surfaces quickly in any collaborative infrastructure workflow. When you first run terraform apply on a personal project, the default terraform.tfstate file sitting in your working directory feels perfectly adequate. The moment a second engineer joins — or a CI pipeline starts running alongside manual applies — that convenience becomes a liability.
The failure modes are well-documented but worth naming explicitly, because each one has caused real production incidents:
- Conflicting state writes. Two engineers run
terraform applysimultaneously. Both read the same state, both write back a modified version. One overwrites the other. The infrastructure now diverges from what Terraform believes it manages. - Lost state files. A developer’s laptop dies, or someone accidentally deletes the file. Without the state, Terraform has no record of what it created. Recovery means either importing every resource by hand or accepting orphaned infrastructure.
- No audit trail. A flat file on disk has no versioning. You cannot tell who applied what, or roll back to a known-good state after a botched run.
- CI/CD incompatibility. Pipelines run in ephemeral containers. There is nowhere to persist a local state file between runs without awkward artifact passing — which reintroduces the same race conditions.
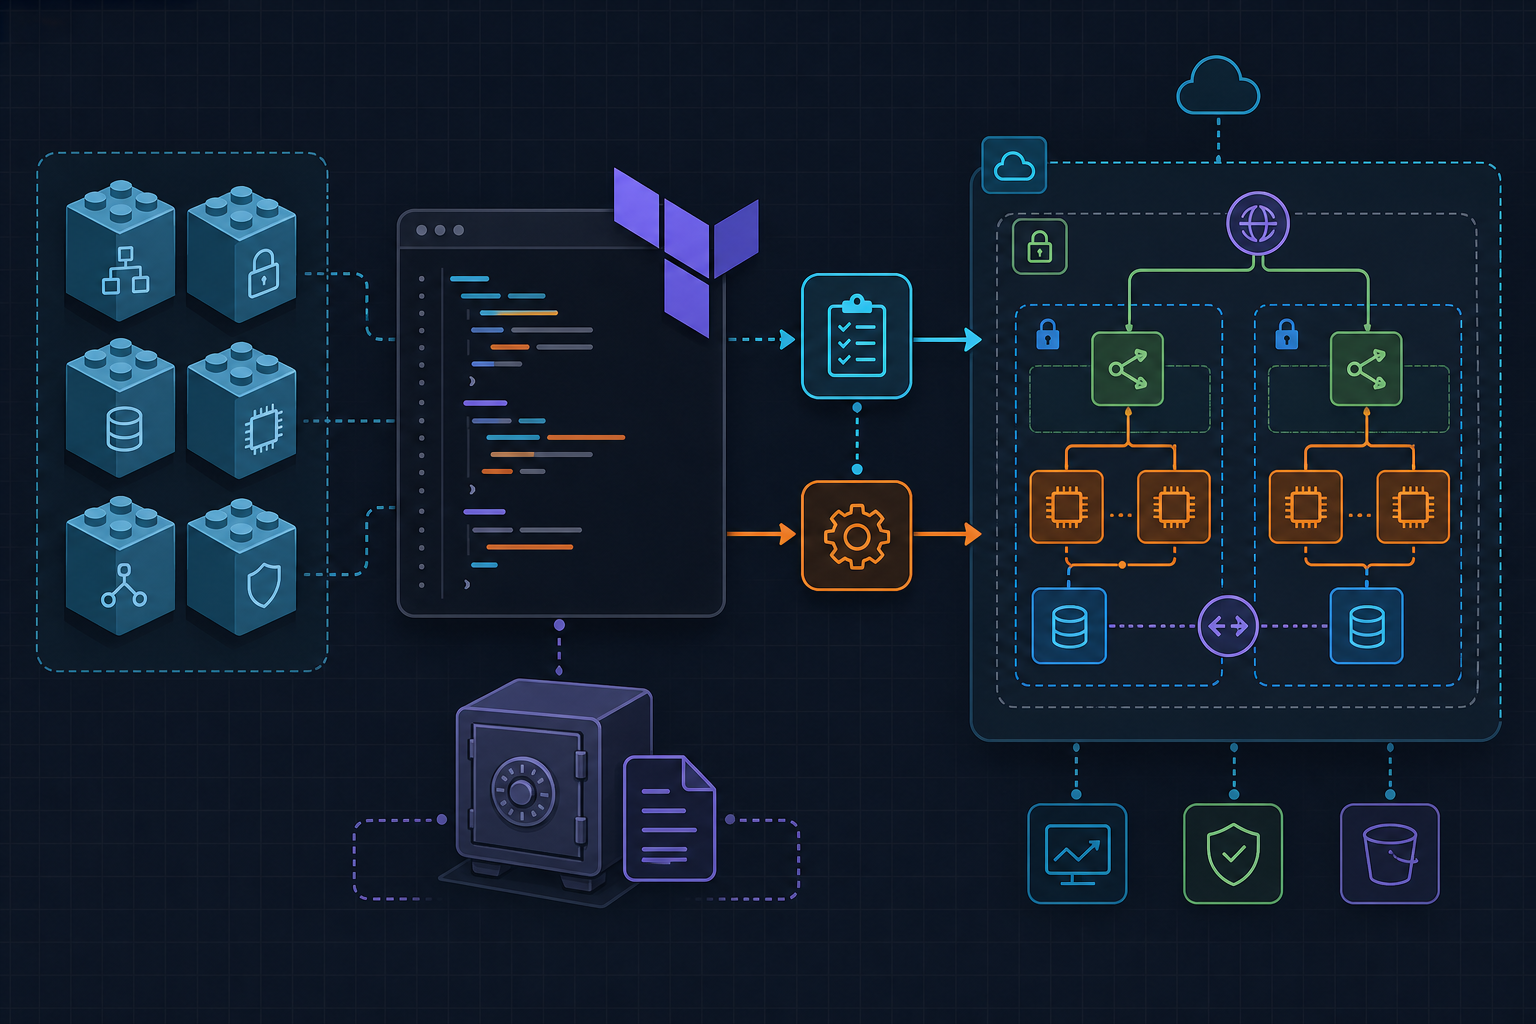
The fix is straightforward: move state to a remote backend with atomic locking. On AWS, that means an S3 bucket for storage and a DynamoDB table for the lock mechanism. This post covers the full setup — bootstrapping the prerequisites, wiring the backend block, understanding how locks behave, and isolating state across environments.
The S3 + DynamoDB Pattern
Before writing any configuration, it helps to understand what each component is actually doing.
S3 stores the state file. Every terraform apply reads the current state from the bucket, computes a diff against real infrastructure, applies changes, and writes the updated state back. With S3 versioning enabled, every write creates a new object version rather than overwriting the previous one. This gives you a complete history of state changes and a straightforward rollback path: retrieve an earlier version with aws s3api list-object-versions and restore it.
DynamoDB provides atomic locking. When a Terraform operation begins, it writes a lock entry to the DynamoDB table. Any subsequent operation that tries to acquire the same lock finds the entry already present and fails with a clear error message — including the lock ID and the identity of the process that holds it. When the operation completes (successfully or not), Terraform deletes the lock entry. This prevents the concurrent-write scenario entirely.
One detail that trips up almost every first implementation: the DynamoDB partition key must be named exactly LockID with that exact casing. A different key name does not cause an error — Terraform simply cannot write or read lock entries, and locking is silently disabled. We will come back to this when we provision the table.
There is also a classic bootstrapping problem to solve. You cannot declare an S3 backend in a Terraform configuration and then use that same configuration to create the S3 bucket. Terraform needs the bucket to exist before it can initialize the backend. The solution is a small, separate bootstrap configuration that you run once — manually, locally — to create the prerequisite resources. After that, the bootstrap config itself can be left with a local state file (it manages only two long-lived resources) or imported into a separate remote workspace.
Provision the S3 Bucket and DynamoDB Table
Create a dedicated directory — bootstrap/ — that lives outside your main Terraform root module. This configuration runs once and is intentionally kept simple. It has no backend block, so state is stored locally in bootstrap/terraform.tfstate. Commit that file to version control or store it somewhere safe; you will rarely touch this configuration again.
The following configuration creates the S3 bucket with versioning and AES-256 server-side encryption, blocks all public access, and creates the DynamoDB table with the correct partition key:
# bootstrap/main.tf  — run this ONCE before adding the backend block
# Creates the S3 bucket and DynamoDB table that will hold remote state.

terraform {
  required_providers {
    aws = {
      source  = "hashicorp/aws"
      version = "~> 5.0"
    }
  }
}

provider "aws" {
  region = var.aws_region
}

variable "aws_region"    { default = "us-east-1" }
variable "state_bucket"  { default = "my-org-tf-state-2026" }
variable "lock_table"    { default = "my-org-tf-locks" }

resource "aws_s3_bucket" "state" {
  bucket        = var.state_bucket
  force_destroy = false

  tags = { ManagedBy = "terraform-bootstrap" }
}

resource "aws_s3_bucket_versioning" "state" {
  bucket = aws_s3_bucket.state.id
  versioning_configuration { status = "Enabled" }
}

resource "aws_s3_bucket_server_side_encryption_configuration" "state" {
  bucket = aws_s3_bucket.state.id
  rule {
    apply_server_side_encryption_by_default {
      sse_algorithm = "AES256"
    }
  }
}

resource "aws_s3_bucket_public_access_block" "state" {
  bucket                  = aws_s3_bucket.state.id
  block_public_acls       = true
  block_public_policy     = true
  ignore_public_acls      = true
  restrict_public_buckets = true
}

resource "aws_dynamodb_table" "locks" {
  name         = var.lock_table
  billing_mode = "PAY_PER_REQUEST"
  hash_key     = "LockID"   # must be exactly "LockID"

  attribute {
    name = "LockID"
    type = "S"
  }

  tags = { ManagedBy = "terraform-bootstrap" }
}
Run this from the bootstrap/ directory:
cd bootstrap
terraform init
terraform apply
Verify both resources exist in the AWS console before proceeding. The bucket name must be globally unique — adjust state_bucket accordingly. Using PAY_PER_REQUEST billing on the DynamoDB table is intentional: lock operations are infrequent, and provisioned capacity would be wasteful.
For the IAM side: any CI runner or human identity that runs Terraform against this backend needs a minimum set of permissions. The S3 side requires s3:GetObject, s3:PutObject, and s3:DeleteObject on the state key path. The DynamoDB side requires dynamodb:GetItem, dynamodb:PutItem, and dynamodb:DeleteItem on the locks table. If you are already following least-privilege IAM practices — as covered in the IAM roles and least privilege policies post on kuryzhev.cloud — scope these permissions to the specific bucket ARN and table ARN rather than using wildcards.
Configure the S3 Backend in Terraform
With the infrastructure in place, add the backend block to your root module. This belongs either in main.tf or a dedicated backend.tf — the choice is stylistic, but a separate file makes it easier to find and avoids cluttering your main provider configuration.
# backend.tf — root module of your real infrastructure config

terraform {
  backend "s3" {
    bucket         = "my-org-tf-state-2026"
    key            = "envs/prod/terraform.tfstate"
    region         = "us-east-1"
    dynamodb_table = "my-org-tf-locks"
    encrypt        = true
  }
}
The key argument defines the object path inside the bucket. Using a structured path like envs/prod/terraform.tfstate keeps things organized when you have multiple environments or multiple root modules sharing the same bucket.
Now initialize the backend. If you have an existing local state file, Terraform will detect it and offer to migrate it:
terraform init -migrate-state
Terraform will prompt you to confirm the migration. After confirmation, it uploads the local state to S3 and removes the local file (or leaves it in place as a backup, depending on your version). From this point forward, all state reads and writes go through the bucket.
If this is a fresh configuration with no existing state, plain terraform init is sufficient. The -migrate-state flag is only needed when switching an existing workspace from local to remote.
One important constraint: backend configuration cannot use Terraform variables or references. The backend block is evaluated before the rest of the configuration, so values like var.state_bucket are not available at that point. Bucket names, regions, and table names must be hardcoded strings. If you find this repetitive across multiple root modules, Terragrunt’s remote_state block solves exactly this problem — more on that in the closing section.
State Locking and Releasing Stuck Locks
During any operation that modifies state — terraform apply, terraform destroy, terraform import — Terraform writes a lock entry to the DynamoDB table before touching the state file. The entry looks like this in the DynamoDB console:
# DynamoDB item written during an active lock (simplified)
{
  "LockID": { "S": "my-org-tf-state-2026/envs/prod/terraform.tfstate" },
  "Info": {
    "S": "{\"ID\":\"a1b2c3d4-...\",\"Operation\":\"OperationTypeApply\",
           \"Who\":\"ci-runner@build-server\",\"Version\":\"1.7.0\",
           \"Created\":\"2026-05-28T10:00:00Z\",\"Path\":\"envs/prod/terraform.tfstate\"}"
  }
}
If a second terraform apply runs while the first is in progress, it reads this entry and exits immediately with an error that includes the lock ID and the identity of the lock holder. This is the correct behavior.
Stuck locks occur when a Terraform process is killed mid-apply — a CI job timeout, a network interruption, or a developer force-quitting their terminal. The lock entry remains in DynamoDB even though no process holds it. To release it:
# Get the lock ID from the error message or from the DynamoDB item,
# then release it explicitly.
terraform force-unlock a1b2c3d4-e5f6-7890-abcd-ef1234567890
Terraform will ask for confirmation before releasing. Do not run force-unlock if you are not certain the original process has actually stopped — releasing a lock while an apply is genuinely in progress defeats the entire purpose of locking and can corrupt state.
You can also inspect the raw state file directly from S3 without going through Terraform, which is useful for debugging or auditing:
aws s3api get-object \
  --bucket my-org-tf-state-2026 \
  --key envs/prod/terraform.tfstate \
  state.json

cat state.json | jq '.resources[].type' | sort | uniq
The official Terraform S3 backend documentation covers additional locking options including assume-role configurations for cross-account access.
Workspace Isolation for Multiple Environments
A single S3 bucket can hold state for multiple environments without any naming conflicts, provided you keep the state files at distinct paths. There are two approaches: explicit key prefixes and Terraform workspaces.
Explicit key prefixes mean each environment has its own root module (or at least its own backend configuration) with a different key value. This is the approach most teams settle on for production use because it makes the separation explicit and avoids the workspace-related footguns discussed below.
# envs/staging/backend.tf
terraform {
  backend "s3" {
    bucket         = "my-org-tf-state-2026"
    key            = "envs/staging/terraform.tfstate"
    region         = "us-east-1"
    dynamodb_table = "my-org-tf-locks"
    encrypt        = true
  }
}
Terraform workspaces provide a lighter-weight alternative when you are working within a single root module. Creating a new workspace automatically scopes the state to a separate path inside the bucket:
# Create a staging workspace — state will be stored at:
# env:/staging/envs/prod/terraform.tfstate
terraform workspace new staging
terraform workspace select staging
terraform apply
The path Terraform uses for workspace state is env:/<workspace_name>/<key>. So if your backend key is envs/prod/terraform.tfstate and you create a workspace named staging, the actual S3 object path becomes env:/staging/envs/prod/terraform.tfstate. The naming is slightly counterintuitive, but the isolation is real.
The caveat with workspaces: they share the same provider configuration, variable files, and module versions. If your environments genuinely differ in significant ways — different AWS accounts, different region configurations, meaningfully different resource counts — separate root modules with explicit backend keys give you cleaner separation and fewer surprises.
Verify It Works
After running terraform init -migrate-state and a subsequent terraform apply, confirm the remote backend is functioning correctly with a few targeted checks.
Confirm the state object exists in S3:
aws s3 ls s3://my-org-tf-state-2026/envs/prod/
# Expected output:
# 2026-05-28 10:05:32      4821 terraform.tfstate
Confirm versioning is active and multiple versions exist after a second apply:
aws s3api list-object-versions \
  --bucket my-org-tf-state-2026 \
  --prefix envs/prod/terraform.tfstate \
  --query 'Versions[*].{VersionId:VersionId,LastModified:LastModified}' \
  --output table
Test lock contention manually. Open two terminal windows. In the first, start an apply that takes a few seconds (a null_resource with a local-exec sleep works well for this). In the second, immediately run another terraform apply. The second terminal should exit with an error like:
Error: Error acquiring the state lock

  Error message: ConditionalCheckFailedException: ...
  Lock Info:
    ID:        a1b2c3d4-...
    Path:      envs/prod/terraform.tfstate
    Operation: OperationTypeApply
    Who:       user@hostname
    Version:   1.7.0
    Created:   2026-05-28 10:10:00 +0000 UTC
That error is the correct behavior. Locking is working.
Confirm the DynamoDB table is empty after the apply completes:
aws dynamodb scan --table-name my-org-tf-locks
# Should return: { "Count": 0, "Items": [], ... }
If the item count is non-zero after all Terraform processes have finished, you have a stuck lock that needs force-unlock.
Related Ideas
The S3 + DynamoDB pattern covers the fundamentals, but there are several natural extensions worth considering as your infrastructure practice matures.
State encryption with KMS. AES-256 server-side encryption (SSE-S3) protects data at rest using AWS-managed keys. If your compliance requirements demand customer-managed keys, switch sse_algorithm to aws:kms and specify a kms_master_key_id in the encryption configuration. The backend block also accepts a kms_key_id argument to encrypt the state object itself using a specific CMK. This gives you key rotation control and CloudTrail visibility into every state file access.
Cross-account state access via IAM roles. In multi-account AWS organizations, you often need one account’s Terraform configuration to read state from another account’s bucket — for example, reading VPC IDs from a networking account into an application account. The S3 backend supports an assume_role block that lets Terraform assume a cross-account role before accessing the bucket. Pair this with a bucket policy that grants access to the assumed role’s ARN, and you have clean cross-account state sharing without storing credentials.
Terragrunt for DRY backend configurations. If you manage more than a handful of root modules, you will quickly tire of repeating the backend block in every one. Terragrunt’s remote_state block generates backend configurations dynamically, interpolating account IDs, regions, and module paths automatically. It also handles the bootstrapping step — creating the S3 bucket and DynamoDB table if they do not exist — which removes the manual bootstrap procedure described in this post.
State file rollback after a failed apply. Because versioning is enabled, recovering from a corrupted or incorrect state is a matter of identifying the previous version ID and restoring it:
aws s3api copy-object \
  --bucket my-org-tf-state-2026 \
  --copy-source "my-org-tf-state-2026/envs/prod/terraform.tfstate?versionId=<previous-version-id>" \
  --key envs/prod/terraform.tfstate
This does not undo the infrastructure changes that were applied — it only restores Terraform’s record of what it manages. Use it carefully, and always verify the restored state against actual infrastructure with terraform plan before running another apply.